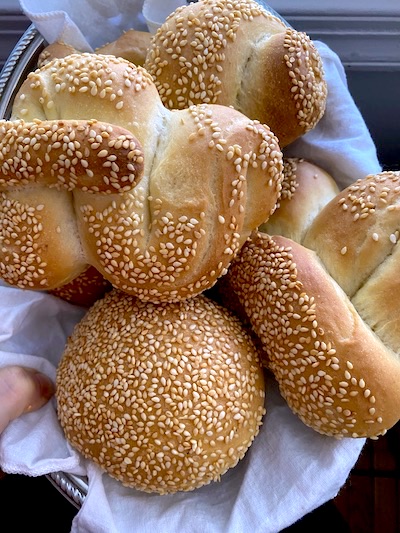
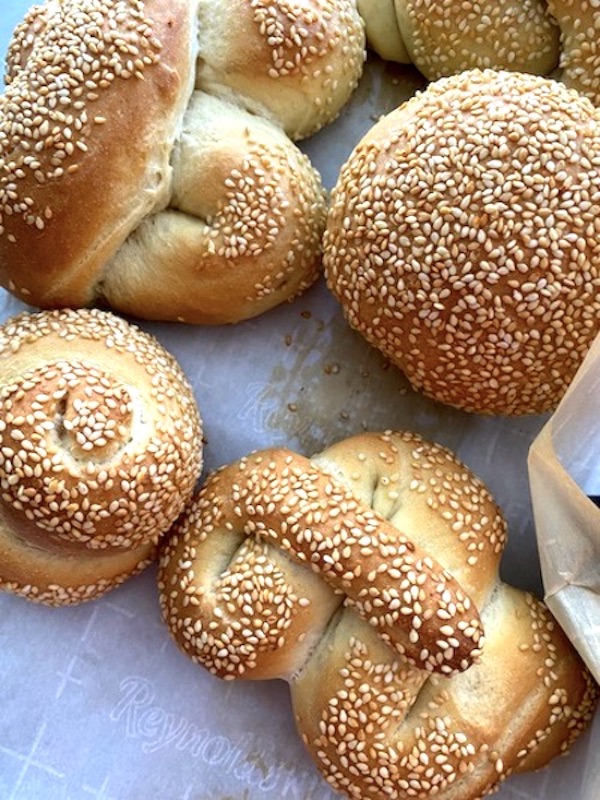
I started making bread like literally everyone during the Covid-19 lockdown. This Sicilian bread, called Mafalda, is the one that I like the most. Because it has a woman name ?, it’s made with remilled semolina flour and has sesame seeds. Bread’s smell in the house brings peace to me. And kneading is my meditation.
I have always made Mafalda bread just using my hands, but recently I decided to convert to the sacred cult of the Kitchen Aid mixer (yeahhh!!!!), and it was love at first sight.
A game-changer was also discovering a new dry yeast: Saf Instant. Wow. It’s impressive how it performs, how easily works, and what a great flavor gives to any baked goods you add it. (to know where I bought it click here)
When yeast was impossible to find, I made no yeast – focaccine, the video recipe on my Instagram (click here to watch it). So easy and quick, go check it and save the recipe for when you forget to buy bread.
The Sicilian bread Mafalda is made using Semolina Rimacinata di Grano Duro, a remilled durum wheat flour. It has a finer texture than the semolina flour you buy for making homemade pasta. I use Mulino Caputo flour – Semola Rimacinata di Grano Duro. I make everything with this flour, from rustic pastries to focaccia. Any remilled durum wheat you can find would work well.
Short note: I use Italian flours because my body didn’t adjust well to some new American foodstuff since we moved here. In particular, American flour, milk, and beans give me stomach aches, acne, cramps, and so on. It took me three years to understand it was a food-related issue.
Mafalda bread is very simple: just water, flour, salt, olive oil, yeast, a bit of honey (for a nice golden crust), and sesame seeds (I like these ones click here).
There is an essential step to not forget: when your oven is off, put an ovenproof bowl filled with water and turn the oven on. The humidity will help to get a golden crunchy crust. It also helps to spray the oven sides in the first ten minutes (trying to not wet the bread).
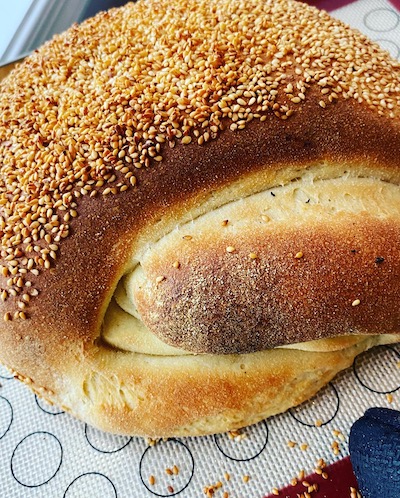
Once I felt inspired to experimenting and made a hybrid Mafalda bread filled with kimchi and covered in black sesame seeds: it was amazing!!!!
INGREDIENTS
it makes 8/9 buns of 100 gr each
- 600 gr remilled durum wheat semolina flour/semola rimacinata di Grano Duro (I use Mulino Caputo)
- 1 tsp dry instant yeast (if you plan to make bread in a shorter time, double up the quantity of yeast) (I use SAF INSTANT)
- 30 ml extra virgin olive oil
- 15 gr salt
- 1 tsp honey
- 300 ml water (you might need an extra 50 ml), at room temperature (if the day is very chill, use warmer water but not hot)
- Sesame seeds
HOW TO MAKE SICILIAN BREAD:
? to watch all the video steps, click here
1) In a big bowl, mix the sifted flour with the yeast. Add water, previously mixed with oil and honey, to the flour and yeast. If using a stand mixer, use the paddle in these first steps of mixing.
When it is all combined (3 mins), add salt and mix to incorporate it.
2) Cover the bowl with a kitchen towel and leave it for 15/20 mins to give the flour the time to hydrate.
3) Switch to the hook attachment and mix the dough at medium-low speed (Kitchen Aid is speed 2), until smooth (could take 5 mins or more)
If using hands, do the same steps from 1 to 3. Then fold the bread every 15 mins (5 times) to help develop gluten strands (to watch folds click here)
4) At this point, I like to put the Mafalda dough in the fridge and bake it the day after. Be sure the bowl is well oiled and tightly covered.
If you want to enjoy the bread the same day, put the dough in a well-oiled bowl, cover tightly, and let the Mafalda bread rise until it doubles up (it should take a couple of hours).
5) After the first rise, punch down the dough, cut it into pieces of the same weight (I make 50 gr and 100 gr), and shape it.
The classic Mafalda shape is a sort of a snake with a piece on top.
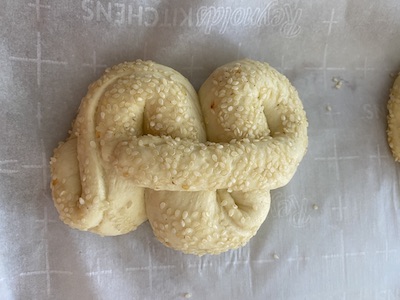
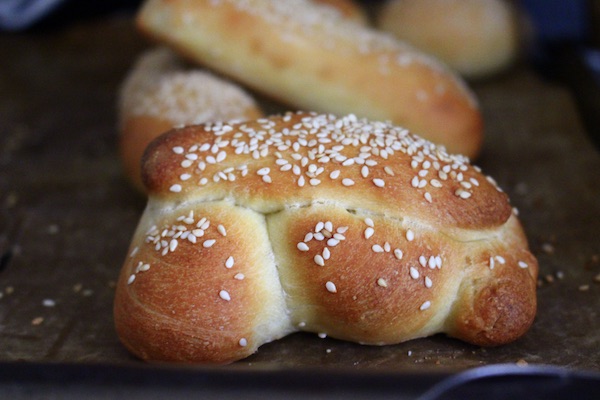
But I have fun making up new different shapes.
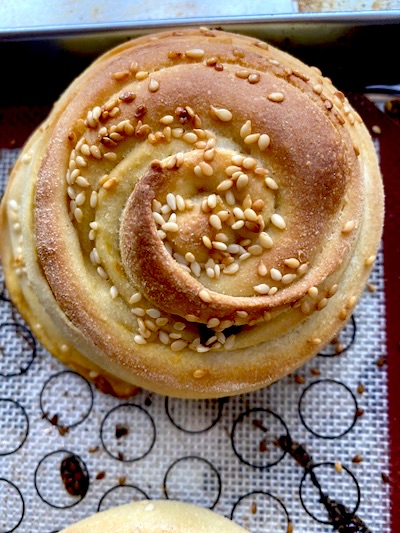
Just remember to make all the same size (almost), so they will bake evenly.
Sprinkle with sesame seeds. They should stick pretty easily. If they do not, lightly spray/sprinkle with water and try again. Cover the buns with an oiled cling wrap and let rise a second time in a warm cozy part of the house, covered with a blanket, or in the oven turned off with the light on. Depending on the temperature of your kitchen, the second rise could take a couple of hours. Or more. Especially if the dough maturated in the fridge.
5) time to bake you Sicilian bread!
Baking tips: you need humidity to get a crunchy crust and super soft inside. Enjoy this video to know what I mean (Sound ON!)
Unless you have a steamer oven, which I don’t have, the best way to get this result is to place a bowl (oven-safe) filled with water and placed on the bottom of the oven before turning the heat on.
Set the temperature to 400 F/ 200 C, and when hot, bake the Sicilian bread for 20 mins, depending on the size.
Small buns will need 20/30 mins, a bigger loaf 40 mins.
Spray the sides of the oven to add more humidity.
Halfway cooking time, turn the pan, and if your bread is still pale (which may happen with a gas oven), switch to convection mode for the rest of the baking time. Watch closely; it might color too quickly. In this way, you will get a nice golden brown color.
Smaller buns usually cook in 15/20 mins. Medium buns usually cook in 20/30 mins. Bigger buns or loaves take 40 mins.
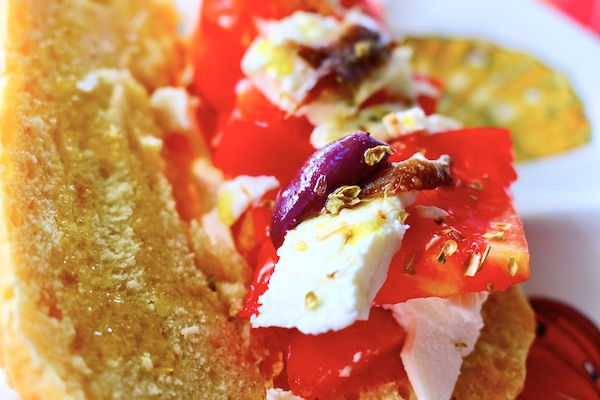
In Sicily, we enjoy this bread warm, with mortadella and a sprinkle of lemon juice. Or with panelle (a super easy chickpeas fritter that I will post soon). Or to make Pane Cunzato which is a warm seasoned bread drizzled with extra-virgin olive oil, anchovies, oregano, tomatoes, and soft fresh sheep cheese. Like this one here:
If you need more carbs, I recommend trying my Pizza dough and Sfincione, the Sicilian pizza. They are delicious and easy to make.
Love you all,
remember to take care of yourself.
Dani











Thanks for finally talking about > How to make Sicilian Bread – CiaoBella!Kitchen < Liked it!
Hello if you leave it in the fridge overnight do you let it get back to room temp before shaping? Thanks
Ciao Julz sorry I didn’t get notified your comment. Yes, let it get back to room temp before shaping but not too much or it will start raise. It depends of your kitchen temperature and where you live but yes. Leave it on the countertop (always) to acclimate. If you need more help and you see I don’t answer comments here please send me an email at dani@ciaobellakitchen.com or on Instagram where I am always active. Thank you!!!
Let me know how do you like it.